


Costumes: Want to See What Other People Have Made?
Contents
NenyaGold’s Goldie The Ranger Outfit … Made for CoE’s Return of the King Party in Dec 2003.
Aniron The Savior-Elf Dress
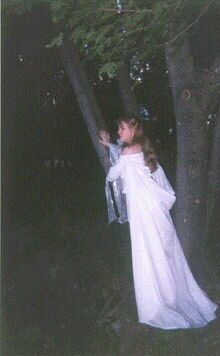
Pattern Directions
Use #P413 from Butterick.
This is a two-piece dress with a belt and cape. I recommend that you start first with the skirt.
Now, the skirt in this pattern is rather full in my opinion, so the piece I used for the skirt was piece 9. When you cut this piece, cut two of it and cut about ½” away from the actual paper. You sew these two pieces together on the sides (don’t make a huge seam). Next you will need a wide band elastic, not too large, but large enough to fit around your waist (above your hips). Sew this to the top of the skirt, making sure the fabric becomes gathered (the gathering may not be very large though since this skirt isn’t supposed to have lots of folds in it). Try on the skirt and pin the bottom hem up so that your desired length is achieved. Sew the hem. If you are working with a material that frays easily, you may want to use a no-fray solution or finish off the edges.
Optional: If you are putting a trim on the bottom that matches the sleeves: Measure a thin piece of fabric that will fit all around the edge of the skirt. Fold this in half and sew it to the inside of the skirt, making sure a little shows off the bottom. I recommend the width of the piece of fabric should be no more than 2 inches.
The top part of this costume is mainly created from scratch, so pay attention. Use pieces 6 and 7 from the Butterick pattern. Cut them as shown, on a fold in your material. Sew these together (front and back) along the side seams, not making them too large of a seam. Only sew up to where the sleeve would start (for those who don’t know, the corner right before the curve. Next is the tricky part. You’ve got to invent your own sleeves, or at least the top half. They don’t need to be very fitted, unless you want to, but you would most likely need a stretchy material for that. The top portion of the sleeve should have a curve that can fit to the bodice. When you sew these on, Don’t sew along the top, just the bottom and the sides. Once the sleeves are sewn on, bring down a hem around the whole neck/shoulder line of the shirt. Leave an opening before you sew!
After this hem is sewn, make sure you’ve made it large enough. Slip an elastic through, making sure it goes all the way around, through the top of the sleeves and such. Try on the shirt and adjust the elastic length to your size. Pin this carefully to make sure the length will stay as you put it! Then sew a box with an “X” through the middle to hold the elastic together. After this is done, you can finish your hem. The ends of the sleeves are basically just finished off rectangles of fabric. You can make these any length you want, just remember each side will have the same length. Sew these onto the sleeve, but only to the top half of the circle. Next, you will hem the top sleeve portion and put in an elastic if desired. Hem the edges of the rectangular piece. You can round the corners, square them, whatever you want them to look like.
Optional: Then take a piece of the rectangular sleeve fabric, no more than 2 inches width, making sure it’s long enough to fit around the top of the blouse. Fold it in half, and stitch it down, making sure a portion sticks up beyond the outer fabric.
The belt is relatively simple. Take a long piece of the rectangular sleeve fabric, sew a seam so that the wrong side of the fabric is facing up (other words, sew it inside out) and then turn it right side out. Iron this so that it lies flat. Finish off the ends of the belt.
For the cape, it would be wise to buy a fabric with two finished edges. Then, you finish the top and bottom edges (make sure it’s not too long). To make this detachable, use Velcro on the shoulders of the shirt and about 10 inches down from the top of the cape, on each side.
Thanks to Jessica for the use of this article.
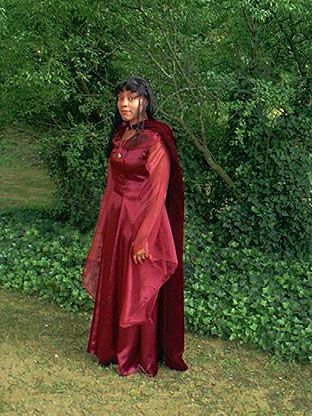
Enwathiel’s Red Elf Dress
I made this because I am an Elf-obsessed-Lord-of-the-Rings-costume-loving person.
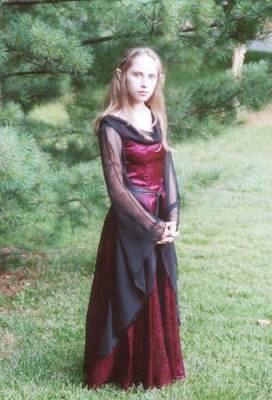
Picture Description
Dress… First of all, I did Simplicity Pattern 9891, dress view A, with the huge sleeves and drape. My measurements are 34-28-38 and I went with a size 6. The measurements for that are 30.5-23-32.5. so you can see it fits pretty largely, because the dress fits me perfectly.
Don’t get caught up in hip sizes at all–the skirt is full enough to allow a ton of extra room. It says on the pattern that there are 2 inches of extra room, so go a couple sizes smaller. Then there’s the 5/8″ inseam allowance which gives room for mistakes.
They also tell you to get a bit too much fabric. I don’t remember how much extra I had.
Making it was pretty simple and straightforward. I used a brocade and it was easy to cut and sew, but it unravels very easily. I used black chiffon for the drape and sleeves, and this stuff is a total mess to work with. It’s very slipperry and evil. I suggest for cutting out chiffon to pin it tightly to a bulletin board and then trace around the pattern with chalk; otherwise it just doesn’t stay.
Be careful when you sew the back drapes, that they meet in the center perfectly, otherwise it looks a bit weird. Sew clasps onto the 2 drape pieces to hold them together over the zipper. I recommend using at least 5, so that there aren’t big gaps.
Hemming it took forever just because the skirt is so big. I used a black ribbon as a belt.

Ears … I used prosthetic Altered Ego small pointed ears. They originally covered the full ear, but I cut the bottom off and spirit-gummed it to my ear.
Shoes … I used some black boots that I found at Goodwill.
Thanks to Enwathiel for the use of this article.
Elf Dress No. 1
Yes, ladies and gentlemen, I have created my first Elf dress! Underdress, overdress, sleeve, undersleeve, and lots and lots of embroidery. Luckily, i found some absolutely delicious fabric at Hancock’s Fabrics which was pre-embroidered.
I used the basic princess seam pattern, and instead of the usual flowy sleeves that reach just about to the ground, I made them tight from the shoulder to just above the elbow, and from there down I made them flare. The undersleeve is a false one, which is joined to the regular dress at the elbow seam. There is a purple trim around the elbow seam and the neckline which has a sort of medieval floral pattern. The underdress (seeing as this is a summer dress) is made of high quality white lining.
Thanks to the expert Seamstress for this contribution
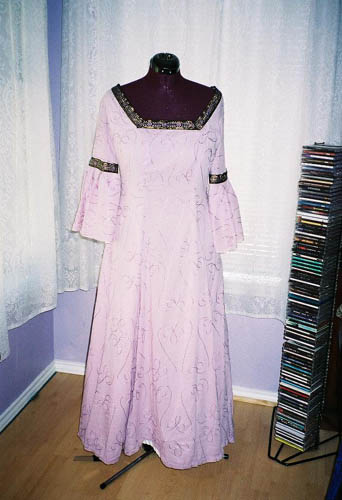
Yoriwyn Stilldusk’s Elf Dress
The body of the dress is made from casa satin and the sleeves are organza. The pattern used is Simplicity 9891View A. Both the cloak and dress took 7 yds of fabric but it usually takes around 6 or so. The sleeves also have about a half yard added to them for added length. I plan to remake the body of the dress because casa satin wrinkles too easy and it’s a bit too shiny for an elf. I also have some burgundy lace I mean to add as an undersleeve to the organza.
I was originally going to choose purple for my color but couldn’t find any that was suitable. The dress was also originally going to be velvet but I couldn’t find any that was a good price till I had settled on the satin. Turns out I think I liked the burgundy better. The cloak is velvet brought from ebay for about $4.25 US. It is a full circle cloak (Simplicity 9881) but can be folded back on itself to only cover the shoulders. There is a tassel sewn into the hood. The seams are frenched seamed so it looks finished and nice on the inside should anyone see it. I will be adding some etching or embroidery to it.

The hair ornament is a bit complicated to explain step by step but it’s a simple concept. I wanted to make one when I saw Arwen with that beautiful one she has on while she pledges her life to Aragorn. The 2 circle anchors are flat jewelry pieces. The body of the decoration is jewelry wire braided together in a simple 3 strand braid and strung across the flat circles. More wire was braided and cut to make the scallop design and the ends tucked into a piece of the braid above it. Near the bottom small gold beads are added onto the wire for interest. After that I thought it would need some sparkle and bought a small package of Austrian crystals and stone holders. I glued the crystals into the holders and attached the holders with jump rings. The whole thing is attached to the hair with bobby pins though I am looking for a better way to hook it on.
I have 2 more oval shaped flat pieces that I will make another one out of when I make my 2nd dress which will be embroidered and gold.
For the Headpiece:
- flat ornamental pieces $1-4
- jewelry wire $3
- small beads $2
- crystals $5
- stone holders $2-3
- jump rings $2
All this stuff can be found at Hobby Lobby or Michael’s Craft Store. With the amount you will get you can make 2-3 hair ornaments.
Thanks to Gabrielle for the use of this article.
