


Five Simple Middle-earth Art Ideas
~ by Ainulindale
Here are some step-by-step instructions to make your own Middle-earth accessories and art. They are relatively simple to make and quite easy on your pocket. If you are not sure how to make them, or cannot find certain materials here, feel free to contact me, or simply improvise!
Three of these ideas utilize calligraphy, but some of you might not be familiar with this. It is not a must to use calligraphy here. You may use fountain or ‘inky’ black pens too. However, this is a chance to pick up a new skill and hobby. Calligraphy is not difficult. (Unless you want to be a professional.) If someone like me can pick it up in a few weeks, any of you can!
Project 1 … Middle-earth through Calligraphy – Signs and Elvish
Materials required: Calligraphy pens, parchment-style paper.
To make your own personalized sign, use any kind of paper you find pleasing, but test it first to make sure that the ink does not ‘bleed’ into it. Using a No. 1 roundhand nib, write your name in a font of your choice.
For the Elvish, take your sources from anywhere; the One Ring, Middle Earth maps, books. Use a No. 3 roundhand nib for the Elvish. A quill pen is just as effective for this.
If you are unfamiliar with calligraphy, I suggest that you use a black calligraphy marker. The results are not as stunning, but it is easy to use, and errors will not be as common.
Go to the Library to borrow books on this subject, and you will find a wide range of ideas to help you. Experiment with your Elvish!
Here is an example when you combine pictures with calligraphy. There is nothing Middle-earth-related in this quote with the birch trees, but you can ‘tone’ your paper with charcoal and write a poem or a quote from Tolkien’s works, along with a picture. It’s very effective.

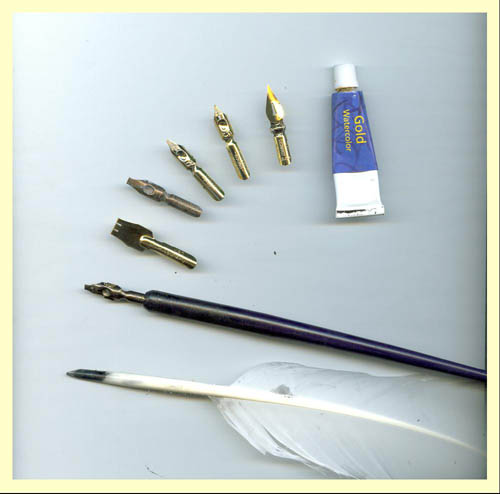
Here are some calligraphy materials: (refer to picture) From left to right, Quill pen (make your own!), Nib holder with a No. 1 ½ roundhand nib and reservoir attached to it, Poster nib, No. 1 roundhand nib, No.3 roundhand nib, No. 5 roundhand nib, copperplate nib, Gold Poster paint.
If you would like to see some examples of LOTR-related calligraphy, you can see some examples by GoldberrysDaughter’s here.
~ by Ainulindale
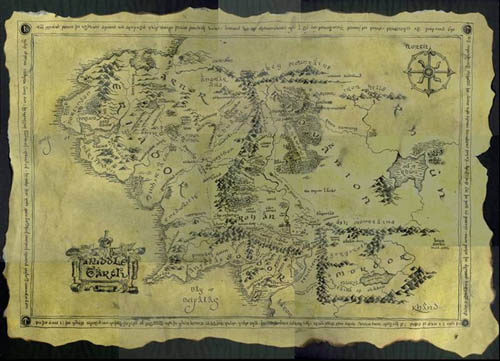
Project 2 … Map of Middle-earth
You will need: Calligraphy pens: No.3 roundhand nib and a copperplate nib, parchment-style paper, mounting board, cigarette lighter/match. (You may use an inky black pen in place of the copperplate nib)
In pencil, copy out the map of Middle Earth onto a large piece of paper. Go over this in calligraphy ink. Use the roundhand nib for the words, (see picture) and the copperplate/black pen for the landforms. Feel free to unleash your creativity here. Each map is different, and as long as the general shape is present, you can experiment with different styles, fonts and designs.
When you’ve finished, you may want to stain your map to make it look old. One good way is to rub over the paper with dried green tea leaves and a little hot water. Oolong tea leaves are also effective, but do not have that greenish tinge. If you cannot find any, normal tea leaves will do. (Tanlaithwen’s Suggestion: I also find that making some tea, pouring it into an oven tray and soaking some paper in it for a while works. This won’t get a greenish tinge though. And don’t forget to soak before you write. 😉 ) Some types of ink are water-soluble and will run when you apply the tea leaves. If that happens, don’t do this.
For that added touch of authenticity, burn the edges of the map with a cigarette lighter; do NOT use a big fire, unless you want to scorch your hard work, or unless you are very experienced at this. Crumple or fold your map slightly to make it look used.
Matches may be used, but lighters are the safest. Remember that safety comes first.
Mount your map on a piece of stiff black paper and hang it on your wall. I displayed mine here on a music stand, as I have practically no wall space.

Project 3 … Elven Brooch Keychain
You will need: a good-quality print-out of the Elven brooch, about the size of your palm, cardboard/stiff card and PVA or white glue.
Cut out the picture of the brooch and stick it onto the piece of cardboard with the PVA glue. Pour a liberal amount of white glue over that and spread it out evenly. It will dry colourless and look like varnish. Cut the shape of the brooch out of the cardboard with a penknife. Be very careful here. If you are uncomfortable using a penknife, get someone to help you. Try not to use a pair of scissors; it will damage the ends of the card. Make a hole in the top part of the brooch and attach a metal keychain ring. This idea can also be done with Arwen’s pendant.
Note: The white glue will make the print colours run and seep into one another, so make sure the picture is fully dry. Wait at least 15 minutes after printing out the brooch before you start.
~ by Ainulindale … Page -3-
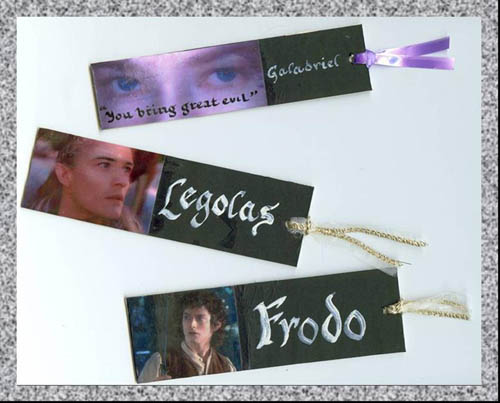
Project 4 … Middle Earth Bookmarks
You will need: Pictures of the characters, PVA or white glue, stiff black card, calligraphy pens, white gouache. You may use white poster paint instead of gouache.
Cut out the picture of the character and stick it onto the black 1.5” by 6” card. Varnish it the way mentioned above with the keychain. When it dries, use the gouache (mixed with a little water) and a calligraphy pen to write their names. If you do not want to use calligraphy, you can also paint on their names with a paintbrush. Punch a hole in the top, and tie a ribbon to it.
Remember, you do not need to follow the colours I give you. A black backing is striking, but any other colour will do as long as you are satisfied.

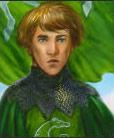
Project 5 … Drawing Your Own Pictures and Mounting them
The best decoration for your walls is art that you have created yourself. Your drawings can be in any medium and any style you wish; charcoal, graphite, you can use colour, draw in anime style, shading, blending … The possibilities are endless. Computer renderings are also extremely attractive. There are some very impressive manga-style pictures and computer-drawn depictions in the CoE fan art gallery that are worth looking at if you want an idea.
Framing every piece of your work is expensive, so I use a cheaper alternative. Mount your completed works of art onto a piece of stiff paper or cardboard. Use blu-tack or glue to stick it to the mounting board, so you do not destroy your paper. I normally use black for contrast, but you should use any colour that complements your drawing. Refer to the picture here for an example. In this picture I mounted my drawings of Galadriel and Arwen on this pretty orange board, and it is quite effective as it does not seem to hinder the greys and blacks blending together. I suggest you do not use fluorescent or bright frames, unless it is actually part of the picture. Your viewers’ eyes will tend to stray away and be attracted to the frame and not on the picture itself.
Of course, if you can afford to frame all your drawings, do not hesitate to!
There are hundreds of other little ideas you can think of to make your world more resemble a mini Middle Earth. Always, after completing an item or project, display them! Use the bookmark when you read, hang up your pictures, attach the keychain to your bag, or even give one to a friend. Nothing is more satisfying than to have your hard work admired by your family and friends.

1 Comment
One word: AWESOME!!! XD