


Gardens of Middle-earth: Moria
A Moria Garden? Sounds like a crazy idea, doesn’t it? Well I’ll let you judge that for yourself. But we imagine a Moria Garden as somewhere where any Dwarf feels comfortable, a shady resting place after a hard day’s work in the mines.
PLANTS
If you’re really dedicated to recreating Moria in your backyard, you could dig up your entire garden and build underneath, but that’s probably unlikely. So, to get the feel of Moria, I suggest using plants with dark foliage and flowers. Dark blue, black or grey would be appropriate, as well as drooping plants. Here are a few suggestions:
 Asarabacca
Skills required: Experienced
Best suited to: shade and light, heavy or alkaline soil.
Height: 8cm
Spread: 30cm
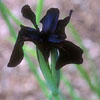
Black Iris
Skills required: Beginner
Best suited to: full or partial sunlight, and light, heavy, acidic or alkaline soil.
Height: 50cm
Spread: 30cm
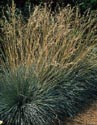
Blue Oatgrass
Skills required: Beginner
Best suited to: full sun and light, heavy, acidic, alkaline or moist soil.
Height: 140cm
Spread: 60cm
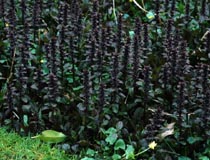
Bugle
Skills required: Beginner
Best suited to: shade and heavy, acidic, alkaline or moist soil.
Height: 15cm
Spread: 90cm

Silk-Tassel Bush
Skills required: Beginner
Best suited to: most soil types, sun or shade.
Height: 400cm
Spread: 300cm
TREES
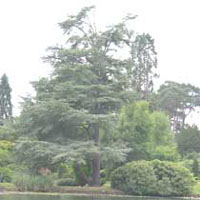
Blue Atlas Cedar
Skills required: Beginner
Best suited to: full sunlight and light, heavy, acidic, alkaline or dry soil.
Height: 500cm
Spread: 180cm

Cedar of Lebanon
Skills required: Beginner
Best suited to: full sunlight and light, heavy, alkaline or dry soil.
Height: 3000cm
Spread: 3000cm
The important things to take into consideration are your climate, garden size, the amount of care the plant requires and how much time you’ve got to look after it! I advise taking a trip to your local nursery and basically you can choose any plant you think you can manage, and that you think has a “Moria” feel. It’s basically all about what you want, and what you think feels like Moria – it’s up to you! As for trees, Hollin trees are obviously fitting for Moria, but I imagine very hard to come by. And obviously, when planting any tree, don’t expect it to spring up overnight!
DECORATING IDEAS
§ A Moria garden should be shady and cool. So, a pergola or even just some large shady trees will help in that way. It is usually relatively easy to find a pergola supplier; a lot of businesses will even put it up for you. And if you’re feeling adventurous, why not attempt some geometrical patterns on the four supports (take a look at the FotR DVD or the screencaps in our Gallery for more ideas there). See the plants section for trees.
§ Moria has a very “blue” feel to it, from the films it is easy to see (see screencaps). So, if you have a fence surrounding your garden, why not paint it dark blue? And if you’ve got a gate or door that you would be willing to paint, attempt the “Doors of Durin” design to greet people when they walk through.
§ If you’ve got an old ladder that you don’t know what to do with, perhaps prop it up against a wall or fence to replicate the “mines”.
§ Other features could include a small water feature – stone fountains or ponds could work. Recently I’ve come across a lot of the large stone blocks or spheres that have water running up through the centre and then out through the top, which could be effective.
§ For lighting in the garden, it is easy to find “fire lamps”, or any sort of fire lighting, which would be good for creating the Moria effect.
§ Leave a few cobwebs dangling around!
FURNITURE
Simple Dwarvish Bench
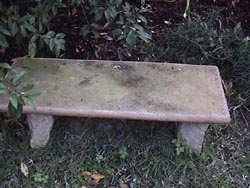
A bench, complete with runes? This is a very simple bench, perfect for lazing around with some malt beer!
MATERIALS
The easiest way to create your Dwarvish bench is to take a trip to your local sandstone or concrete supplier (check your phone book for details of suppliers in your area). If all goes well, you should be able to find the following:
§ SEAT: 1 x rectangular concrete/sandstone slab, approx 3 feet long, 1½ foot wide, 1 inch thick.
§ LEGS: 2 x concrete/sandstone slabs, approx 1½ foot high, 3 feet wide, ½ -1 foot thick.
§ Black latex outdoor paint for runes
HARDWARE – Small, thin paintbrush
Now you’re ready to start! The great thing about this bench is that it requires no handywork or anything of the sort, so you should have it assembled in a few minutes and ready to paint!
Step 1: Find a very even area of ground for your dwarvish bench, perhaps under the shade of a Hollin tree? I suggest putting the bench on a flat area of grass.
Step 2: Set the two legs in upright positions, a bit under 4 feet apart. Place the seat on top, and ensure that it is steady. If you want to, you can secure the seat on top with superglue, but this is not necessary, the seat should stay steady on its own (because of the weight of the slabs), but even ground is a must!
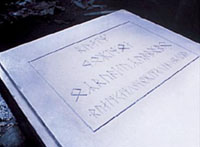
Step 3: Look through your Tolkien book collection, and choose some Dwarvish runes to put on the bench (e.g. the runes on Balin’s tomb perhaps?). Then you can go ahead with the black paint and carefully copy them from the book. You can also paint the entire seat if you should want to.
Now you’re all ready to sit back with some malt beer and enjoy!
~ drunken_elf
