


Weapons for LARP: How to Make a Boffer Sword
~by Kaylin
How to Make a Boffer Sword
*All images have been used with the permission of the World of Vaithan Staff.
You know them, you’ve seen the LARPers with them, now you want one. So how do you go about making one, that is LEGAL to use in games like Havok! and NERO?
Follow the steps below and be sure to talk to the Worldmasters/ Storyteller for their input as well, but at least I can give you some basic steps.
Materials:
Closed cell Foam (AKA: Blue Foam or Camping Foam): Sold in rolls at most camping stores.
Open Cell Foam: Used in upholstery. Sold at fabric stores in different thicknesses. It is recommended that you use the 1 inch thickness.
PVC Pipe: Used as the Core of the weapon. Found at any good hardware store, use the white or beige pipe. Do not use Grey or Black pipe, as it will break and splinter instead of bending (Remember, these are boffer weapons after all). Look for pipe that says: “SCH 40” on it. You will also need and end cap as well, which are available where you buy your pipe (or alternately, you can use leather strips in an “X” taped securely to the end or a rubber cork that fits.) Standard core sizes vary from weapon to weapon, but for a single handed thrusting sword, a PVC core of no longer than 24 inches should be fine.
Duct Tape: Again, found at a hardware store. Can be avilable in different colours, or metalic shiney variety. A word on the shiny metalic variety, it does tend to fade after a while from prolonged use.
Contact Cement: I recomend Elmer’s Contact Cement in a CAN, not the tube and it is available in a solvent-free variety.
For making a realistic-looking Boffer Sword:
1. Mark a pattern on paper of the sword design that you want. Newspaper is good for this, as is brown packing paper. When you are satisfied with the look, cut out 4 parts about 3- 4 inches wide a peice, including the tip; two of the closed cell foam and two of the open cell foam. The best way to do this is to lay your PVC core down on the paper and measure an inch to an inch and a half from the edge of the PVC pipe to where you will mark your lines for your sword.
The end of the sword (the part you use to jab into someone) will need to be re-enforced with at least one strip of foam. Cut a length of closed cell foam approx. 1 inch wide and 6 inches long. Fold it in half and tape it securely over the end cap along the length of the core.

Just to give you the basic layout idea.
2. Secure the core to the two peices of the Upholstrey foam you cut out earlier, using the contact cement. Be careful with this and take your time, as once you lay it down, the contact cement will grip it and you will ruin the foam if you pull it up to remove it. Wait a few moments for it to bond fully, or follow the user’s directions on the can for drying times.
3. Lay the Camping Foam over the Upholstrey foam and tape it every 3 inches. At a cross section of your sword, it should go: Outer Camping foam, inner Upholstrey foam, PVC tube, inner Upholstrey foam, outer Camping foam . Now tape the sword together, and pay attention to the edge. If you tape it tightly, it will make it look more like the edge of a real sword, but if you tape it TOO tightly, it will take the squishiness from the edge. Cover the entire blade with duct tape.
4. For the guard: Cut two peices of garden hose and lay them side by side, then tape the ends together. Slip the taped peices over the PVC handle to the foam and tape the guard securely to the handle. The pommel can be as simple as a peice of shaped foam on the end of the handle, as that way it is also safe for you as well. Use some darker coloured fabric (Leather works well for this) or hockey tape on the handle and VOILA! Your sword is now ready to use.
Certianly, you are not limited to making just swords. Daggers, Axes, short swords, Long swords, and you are certianly not limited to the decoration you can add to your weapons. Paint will be pretty much useless in this situation, paint tends to flake off or get worn off from use, but if one was inclined, markers would be best. I found that those gold ones do a nice job..ususally when we worry about appearence, we use colored duct tape. Acrylics work ok, so long as they are sealed with a flat enamel spray type fixative, and expect to do ALOT of touch up work (Like, after every time you use your weapon.)
Using leather strips for the handles are also a fancy way of decorating your weapons. Adding fake fur, leather straps, even synthetic vines from craft stores can be used, so long as they are secured and made safe.
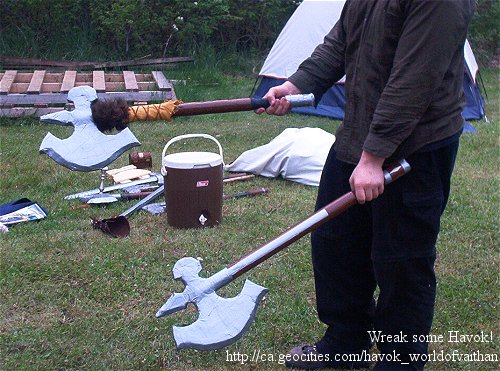
A Player shows off his hard work and attention to detail on his dual axes.
Always make sure that your weapon is tested out and looked at BEFORE you bring it to a game. It’s always a good idea to have your weapon checked out and cleared by the Worldmasters/ Storytellers of a game to make sure that there are no bits that stick out and could hurt someone.
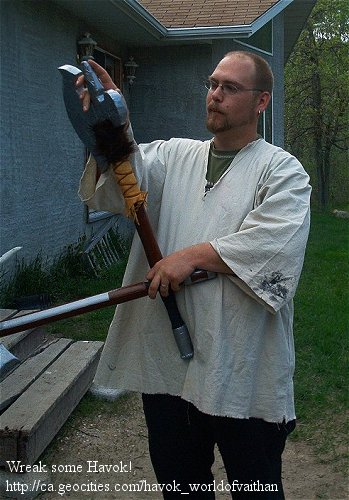
Inspection time!
The Worldmaster/Fighting Spirit checks to see if the axes are good to go!
Enjoy that weapon, and be sure to give it frequent checks to make sure that it remains in good condition.
